Saturday 31 March 2018

Heartfelt Blooms

We've finally got to the last card in the Book Box set, there are six in all which means this is the penultimate post; with the final one showcasing the Book Box. I've tried to cover as many occasions as possible, making the sentiments reasonably generic to cover several events where possible. This card is no exception expressing heartfelt thoughts. Ideal to offer hope and sympathy and this type of card is never really easy to make. Should you use colour... a little bit of bling... fancy folds... We all have our own interpretation of what is acceptable.


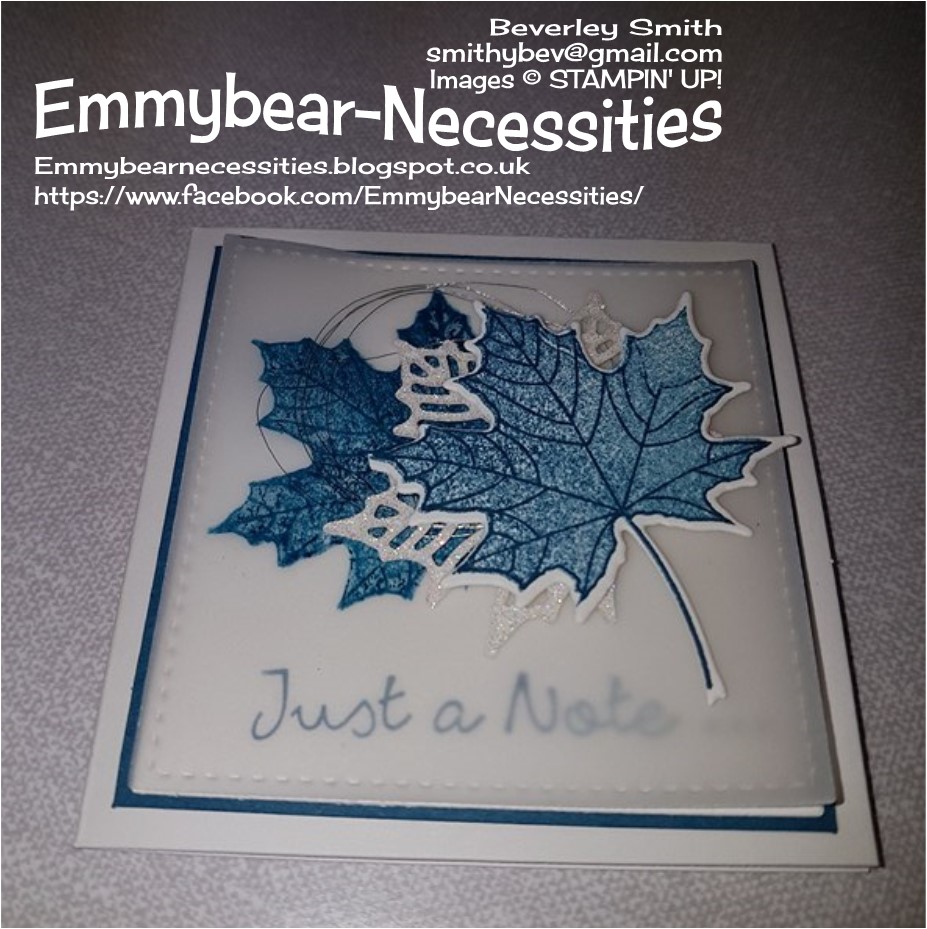
I personally like to use more muted colours and so once again am using Pool Party. Those who know me well might suggest a Freudian slip as I used the same colours for the wedding card!


When Heartfelt Blooms first came out for Sale-a-bration I wasn't too sure about it. However, while for me it was a slow burner, I wouldn't be without it now. Using just one colour you get light and shade with this stamp, it really looks amazing. I've also seen it stamped in a very pale colour and then coloured using the watercolour pencils for a totally different look. Sale-a-bration is a fabulous event running from January until the end of March where for every £45 spent, you can choose an item from a varied selection. They include DSP, ribbons, stamps, embossing folders and dies and often co-ordinate with items in the main catalogues.


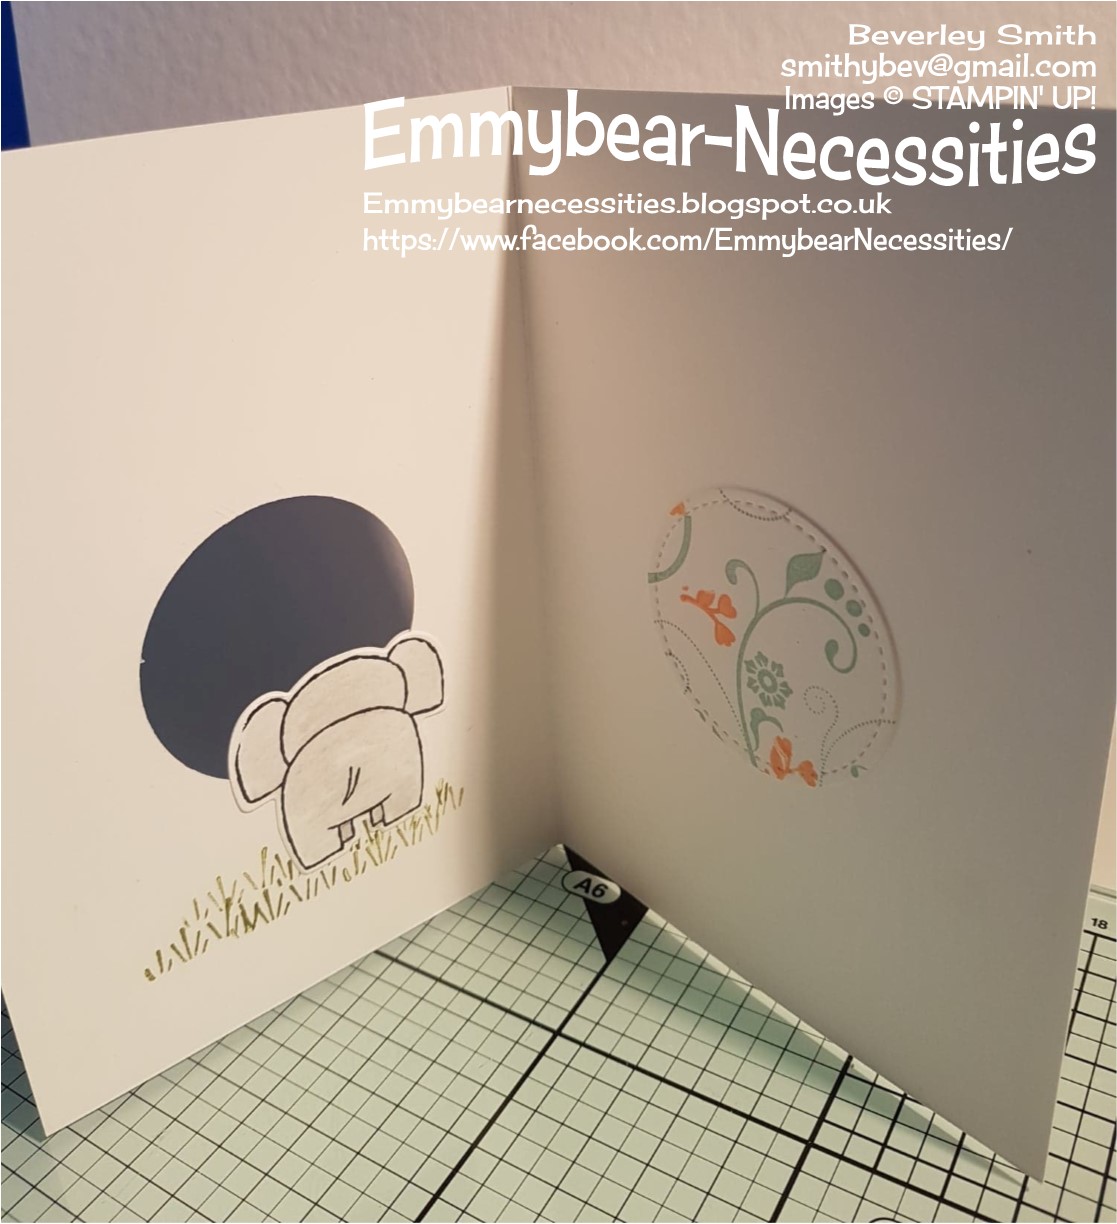
As you can see, I partially stamped the image at the top and then fully stamped it in the opposite corner. My sentiment was stamped directly onto the card which was mounted onto the card base after I'd wrapped some ribbon round. A small bow added the final touch. As usual I decorated both the inside of the card and the envelope.


Tuesday 27 March 2018

Dragonfly Dreams

Hello, if you've been following my blog we've made it as far as card number five of the book box set. This time I revisited a card using Dragonfly Dreams that I'd made at Coffee and Cards with Susan at Craftyduckydoodah.


These are the cards made with Susan. I loved the colours used, however, this time I needed to use a particular colour palette for my project.


Once again my colour palette was based on the Delightful Daisy DSP, using Calypso Coral, Daffodil Delight, Old Olive and Whisper White.


I used Gorgeous Grunge to stamp the Whisper White base card using Old Olive and Calypso Coral. The stamped lines replaced the washi tape on the original card. Then I added a Stitched Shape square with a border in Calypso Coral.


The dragonfly was stamped and coloured with Watercolour pencils; I used the blender pen so that I didn't end up with any blocks of colour or harsh lines. I then fussy cut the image out. There is a slightly smaller dragonfly die you can use if you really don't like fussy cutting! The dragonfly wings were gently shaped so that it didn't lie flat against the card.I arranged the leaves - not Stampin' Up this time - and added Silver Metallic Thread that had been looped around my fingers first.


Typical me, managed to get a tiny ink mark on the inside of the card so to cover it up I decorated the left hand side for a change. In crafting there are no mistakes. I like to think of them as happy accidents.


I like to add a little image on the inside of the card and also on the envelope for a cohesive look. I don't know about you, but I always open cards with a decorated envelope before plain cards. They are just that little bit extra special.


My sentiment was stamped directly onto the base card. As I don't feel confident at stampin straight I try to use my stamping precision press. I'm really not as bad as I think I am but it really does take the worry away.


Saturday 24 March 2018

Lots of Lavender

Hello, if you've been following my posts you'll know that I made a book box and filled it with a variety of cards for a friend and work colleague using colours found in the Delightful Daisy Designer Series Paper.


This is card number four and for this one I chose to use Lots of Lavender which was free during Sale-a-bration with a spend of £45. I have to admit that I'm not using colours associated with lavender as I need to keep to the colours found in the DSP.


I used a base card of Calypso Coral; while I love lots of white space, this time I wanted a bit of a zing. The eagle eyed amongst you will also have noticed that I've used a little Crumb Cake too, which although isn't one of the DSP colours, works really well with Calypso Coral and Old Olive. It also gives a much softer stamped image.


Because I've used a coloured base card, I added a Whisper White insert for writing on. As usual I stamped inside the card and on the envelope.


Whilst this stamp set could be used for may occasions, I thought it would make a lovely thank you card this time. I know lots of people have used the watercolour pencils or write markers to colour in the image but I've stamped the colour, making it very quick to make.


I used some burlap ribbon, unfortunately not from Stampin' Up! which is a better width.


Tuesday 20 March 2018

Anyone for a Wedding?

And so onto card number three of my project; this time to celebrate a wedding. Now I know I said I wanted to stick to the colours of the Delightful Daisy DSP but it is becoming apparent that my favourite colour is Pool Party! This time it was only teamed up with Whisper White for a very, in my opinion, elegant look.


I decided to make an easel card using Floral Phrases. They really are easy to make although it took a little bit of time to line up the Detailed Floral Thinlits so I was happy with it. This time I chose to use Pool Party as my base card, with Whisper White as an insert and also behind my die cutting.


The sentiment for the front was stamped onto card and die cut using an oval Stitched Shape Framelit. I also placed a piece of white ribbon around the front of the easel and finished off with a small bow. 


I retrieved a few of the tiny die cut flowers and leaves  after releasing them from the die and added them to create a little more interest to the front. Pearls were placed in the centre of each flower.


Oops, can you see the stray pearl? It tried to escape... Luckily I spotted it and secured it back in place before the card went to it's new home. Unfortunately I forgot to take another photo.


Saturday 17 March 2018

Baby, it's A Little Wild!

So now we're on to card number two from the boxed set. If you'd like to see the first card, it's in the previous post. This time I made a card for a new baby; I don't know about you, but I find I need lots of these...
                 ...and wedding cards. So many of the girls I used to work with are settling down, marrying and starting families.


Stampin' Up! do a fabulous bundle called A Little Wild. I adore this set for babies and children. The dies make double sided tags but with a small adjustment, you can use the front and back of each animal on a card as I have. I chose to keep it gender neutral by not using pink or baby blue.


Once again I used a Whisper White base card. I then took more white card stock and using a retired stamp set called Flowering Flourishes made my own DSP using Pool Party ink. Any spaces were filled using a small stamp and Daffodil Delight which came out much brighter than I'd expected. This was adhered to the base card, leaving a small plain white border. I then cut a circle through both layers.


The patterned circle was then stuck down to the inside of the card lining up to  the hole in the front. Using a piece of Whisper White card I stamped, coloured and die cut the elephant. It was then trimmed to remove the loop. Only the head was needed from the front image so that it gave the impression of peeking through.


The back of the elephant was stuck inside the card carefully matching it up to the head. A little grass was stamped around his feet to "ground" him.


I used both first and second generation stamping to make the balloons which were then punched out. They were stuck down using dimensionals. The string was stamped and a bow secured to cover where string and balloons met - there was a very tiny mis-match. All that it needed was a simple sentiment adding. I chose to place it bottom left to balance out the balloons.


I didn't need to add more decoration inside but as usual, I stamped on the envelope for a cohesive look.


Tuesday 13 March 2018

Jar of Love meets Delightful Daisy

Hello, I've finally made it into my craft room. End of term just can't come soon enough, while I love my job in college, it really doesn't leave me as much time as I'd like to be creative now that I'm full-time.

A while ago I made a book box and filled it with cards as a little thank you to a work colleague who sometimes gives me a lift home. She lives in the same village as me luckily and I have to say I really appreciate her kindness, especially at the end of a hectic day.


Today I'm going to show the first of the cards I made. I based them all on the colour palette of the Delightful Daisy Designer Series Paper although I did use various stamp and die sets for a range of cards that hopefully cover most life events.


For this card I went back to one of my favourite stamp sets, Jar of Love. I chose to use a Whisper White card base for this birthday card. My DSP was cut smaller and using a collar fold mounted onto Calypso Coral. I really like collar folds as it shows off both sides of the DSP. This in turn was stuck onto the front of the base card.


Using a scrap of Whisper White card and the Pool Party ink pad I stamped the small jar and mounted onto the card to the left hand side. I don't know about you, but I love stamping and die cutting leaves, flowers and butterflies so that I can use up the smallest scraps of card stock. I hate throwing any away and if it's big enough to take a die or punch then I put it it in my scrap folder for later use. I arranged the flowers and stuck down using dimensionals once happy with the layout


A small bow using Pool Party ribbon and birthday sentiment taken from the Cake Soiree stamp set completed the look. As usual I decorated the inside of the card and the envelope, this time by adhering a strip of the DSP along one side.


So, this is card number one, I hope you like it. Keep an eye out for the other four cards and the book box I made for them to go in.


Saturday 10 March 2018

Just a Note with Colorful Seasons

Hello, hopefully this post will finally make it into print; I originally forgot to take photos and had given this set as a little thank you gift. Luckily the recipient brought the set into work enabling me to get a couple of photos, so a huge thank you Danusia.
I then went to add the final photo...
...and lost all of the text. C'est la vie! 

Those of you who take the time to read my blog will know I have a penchant for 3"x3" cards and boxes to keep them in. They really do make lovely little gifts for people. For this set I used the 2016 - 2018 In Colours.


My design was inspired by note size cards I'd made at a Coffee and Cards session with Susan aka Craftyduckydoodah. using Colourful Seasons. This set is fabu;ous as it really does do what it says on the box and cover each season. If you can only get one stamp set, this is the one and if you buy it as a bundle with the corresponding dies you makine a saving of 10%.We all love a bargain.


 I just thought that with some tweaking here and there the design would fit perfectly onto a small square card base.


I used a white card base and matted and layered in both my chosen colour, Whisper White and vellum. I cut the Whisper White and vellum using the largest square from the Stitched Shape framelits. I stamped the leaf and outline onto the vellum which gives a slightly softer look as well as Whisper White which was die cut. The skeleton leaf was die cut from Dazzling Diamonds Glimmer paper. I chose to stamp my sentiment directly onto the Whisper White. The vellum was attached to the card beneath the arrangement of leaves so the adhesive didn't show through. Loops of silver thread were secured behind too.


The pizza style box was based on my previous box, though the sides were stuck down slightly differently. As ever, I worked it out as I went along so have no instructions, sorry. For the decoration I added more leaves and finished it with a small bow.


Saturday 3 March 2018

Flying Home

Hello, as soon as I saw the Flying Home stamp set I knew it would soon be winging it's way to me. It's taken a little while to get round to inking it up but I just love the results with my first card; perfect to send to someone that has just moved into their new home. In fact I think I might already have a recipient within the next few weeks, all being well. I also thought mamma bird feeding her chicks in the nest could make a great card to celebrate the birth of a baby!


Although my card base is Whisper White, I chose to use Soft Sky to create a border. I partially die cut a circle, completing the cutting around the nest with scissors. I love this effect; it can be a little time consuming to get it right but really is quite easy.


I used a combination of Stampin' Up watercolour pencils and ink pads in conjunction with a blender pen to spread the colour.


I used dimensionals to create a 3D effect and placed some linen thread behind the sentiment which is from the At Home with You stamp set.